

PostgreSQL Tutorial - Basics (Windows)
In this tutorial, we will go over some PostgreSQL basics that new developers must be familiar with. You will learn to create users, databases, tables, and columns and add data (rows) to tables using pgAdmin and the psql shell.


This tutorial can be used as a reference or followed in order after first installing PostgreSQL on windows. If you don't have PostgreSQL installed check out our PostgreSQL installation tutorial for windows.
Part 1 - SQL Shell (psql)
If you're new to Postgres, it's a good idea to get familiar with the psql shell as you may find yourself needing it from time to time. Start the shell from the start menu and hit enter when asked for Server, Database, Port, Username and enter the password you chose when you first installed postgres.
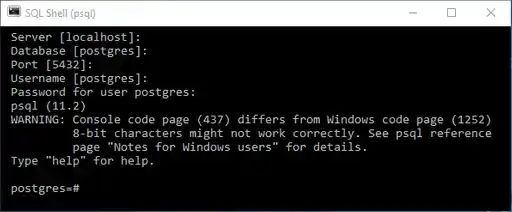
You are now connected to your server through the shell using the default username and password (postgres).
1. Create a user
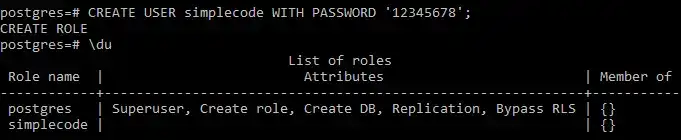
A good first step after installing PostgreSQL is to create a new user and leave the default 'postgres' user alone. Enter the following SQL to create a new user:
CREATE USER user_name WITH PASSWORD 'password';If successful, you should see the message 'CREATE ROLE' and if you type:
\duyou will see a list of all the users on your postgreSQL server (including your new one)
2. Create a database
Let's create a database for that awesome project your working on and give your new user privileges to access it. Enter the following to create a new database:
CREATE DATABASE database_name;Now grant your user privileges to use this database:
GRANT ALL PRIVILEGES ON DATABASE database_name to user_name;You should see the following if everything went well:

3. Test the new user and database
Exit out of the shell using:
\qand reopen the shell from the start menu. This time login using your new user and database:
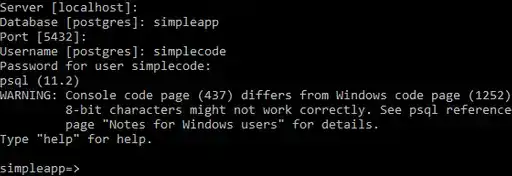
You can see in the image above that I am logged in and connected to the simpleapp database. Type the following to see if there are any tables in this database:
\dtAnd of course you will get a message telling you there is nothing in this database because you just created it:

4. Create a Table
Let's add a table to our database. Enter the following, replacing datatype with one appropriate for the data you expect to keep in that column:
CREATE TABLE table_name(column_one datatype, column_two datatype);and type the following again to see that your table exists:
\dt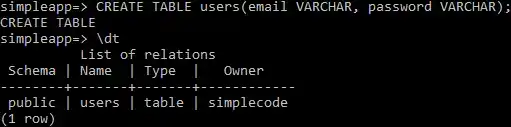
So far the shell has been useful for running some basic SQL and to get an idea of how our database is structured. But you can imagine if it contained millions of rows of data across multiple tables how hard it would be to manipulate it all in a shell based environment. That's where pgAdmin comes in.
Part 2 - pgAdmin
pgAdmin is a browser based GUI that connects to your PostgreSQL server. It allows you to better visualise what is going on in your databases and manage them in almost any way you need. Launch pgAdmin now from the windows Start Menu.
1. Connect to a Server
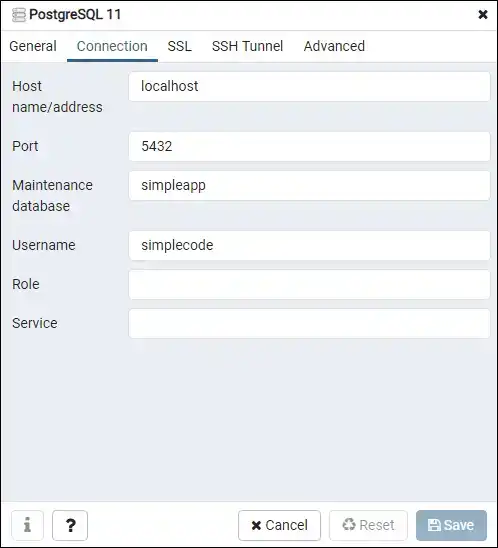
On the left hand side of the window, right click on your postgreSQL server, select properties and then the connection tab on the pop up window. Enter the database and username you setup through the shell earlier. Click Save.
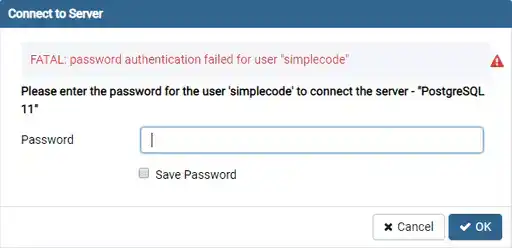
Back in the main pgAdmin window, this time left click on your server name and enter your users password in the following popup. Click OK.
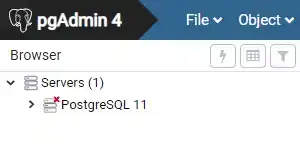
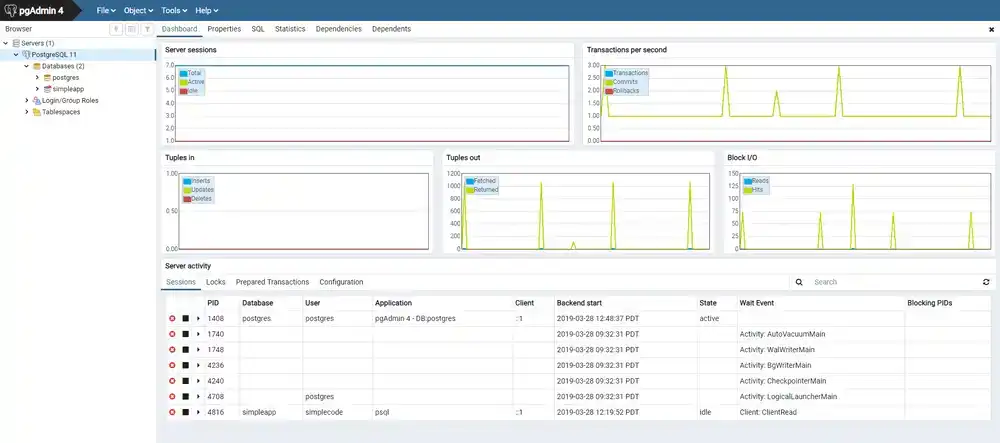
You should now see the pgAdmin dashboard showing some stats for your server. On the left hand side should be 3 new drop downs. Click on 'Databases' to see a list of databases on your server. An 'x' over a database name simply means you aren't connected to that database right now.
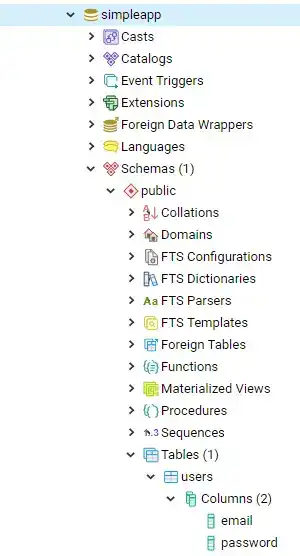
Click on your database to connect to it and select Schemas > public > Tables. You should see the table you created through the shell earlier. Click on the table and select Columns to see those columns you set up at the same time. Pretty cool huh? \
2. Use the Query Tool
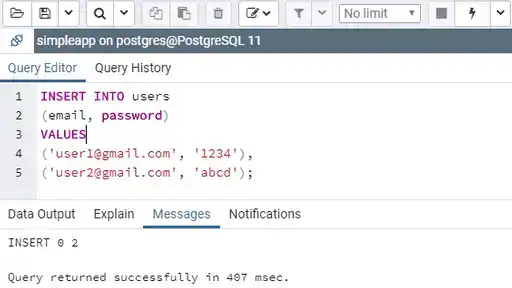
Now to finish off let's add some data to our table using the pgAdmin query tool. At the top of pgAdmin, right under the main menu on the left click the lightning bolt icon. This will bring up the query tool where you can run the same SQL you ran through the shell (and any SQL for that matter). Enter the following to add some data to your table:
INSERT INTO table_name
(column_one, column_two)
VALUES
('value 1', 'value 2'),
('value 3', 'value 4');
And click the lightning bolt at the top of the query editor to execute it.
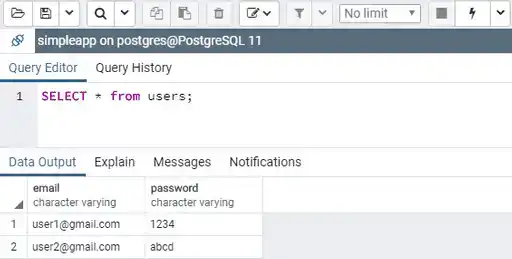
Now clear out the query editor and execute the following:
SELECT * FROM table_name;to see the values that you just entered in your table
Conclusion
Working with PostgreSQL isn't much more complicated than what you have gone over in this tutorial. With pgAdmin and some basic SQL, you can see how easy it is to manipulate your databases and the data they contain. Your next step would be to brush up on your SQL, learn how to properly structure a relational database and secure your PostgreSQL server.
Stay tuned for more tutorials where we will help you become a PostgreSQL master and share this tutorial on social media if it helped you out :)
Tools
Crypto Alerts
© Cloud Giant 2024. All rights reserved