

Build an Admin Template w/ Semantic UI React - Part 2: Login/Signup
In this tutorial, you will create a login and a signup page using Semantic UI React components and React Router 5. This is part 2 of a series of tutorials where we walk you through building an admin template/dashboard using Semantic UI React, React Router 5 and React Redux.


If you would like to learn how to build a back end for this project, check out our series on creating a REST API with PostgreSQL and KnexJS
More from this series
- Intro/Setup
- Login/Signup
Introduction
You are probably looking to build a dashboard to give your users a super secret password protected area on your website or webapp. Well then, you'll need a way for them to sign up and log in. We'll create these pages in this tutorial and Link them together with React Router so that in a later tutorial we can make them truly functional by connecting them to an API using React Redux to manage state. Let's get going.
Project structure and a new package
First, do some initial setup by installing react-router-dom and create the files and folders you'll need for the rest of the tutorial.
1. Install React Router
React Router is arguably the best way to do routing in React. And that's what we'll use for this admin template project. Install it now using the following command in your terminal:
npm install react-router-dom2. Add a logo
Although you can do without a logo, it helps to give your pages a little color. Find a logo that you'd like and add it to a new folder called images in the src directory.
3. Authentication files
Create another folder in the src folder called components and in there create a folder called auth. Here, create these five files:
- auth.css
- Layout.js
- Login.js
- Signup.js
- Done.js
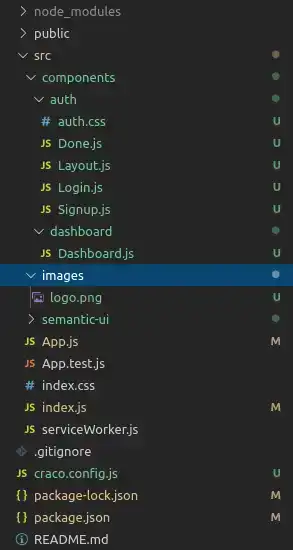
4. Dashboard component
Create one more file called Dashboard.js in src/components/Dashboard. Your project structure should now look like this:
Adding some style
We're going to need some css to give our pages some style. Add the following to auth.css so that you can import it later in your components:
.auth-main {
  height: 100vh;
  background-color: #eaeaea;
}

.auth-content {
  left: 50%;
  padding: 10vmin;
  position: fixed;
  text-align: center;
  top: 50%;
  transform: translate(-50%, -50%);
}

.auth-card {
  background-color: #ffffff;
  box-shadow: 3px 3px 8px #888888;
  border-radius: 4px;
  width: 400px;
  min-width: 300px;
  text-align: center;
}
.auth-logo {
  width: 118px;
  margin-bottom: -10px;
}
.auth-form {
  margin-top: 35px;
}
.auth-input-field {
  font-size: 18px;
  margin-bottom: 25px;
}
Feel free of course to play around with the styling as you wish. This is just some basic css to make the login and sign up pages look halfway decent.
The Layout Component
Login/Signup will share some common elements such as an overall design, a logo and a header. In the name of keeping this DRY, create a Layout component that you can use later to wrap your pages with.
In your Layout.js file, add a new class based React component and import your auth.css and logo file:
import React, { Component } from "react";
import { Form, Header } from "semantic-ui-react";
import "./auth.css";
import logo from "../../images/logo.png";

class Layout extends Component {
  render() {
    return <div></div>;
  }
}

export default Layout;
Now add a few divs to get the styling right. Add your logo and a Header and Form.Group component (from Semantic UI React):
render() {
    return (
      <div className="auth-main">
        <div class="auth-content">
          <div className="auth-card">
            <img src={logo} alt="Logo" className="auth-logo" />
            <Header as="h2" color="black" textAlign="center">
              {this.props.header}
            </Header>
            <Form.Group size="large" className="auth-form" autocomplete="off">
              {this.props.children}
            </Form.Group>
          </div>
        </div>
      </div>
    );
  }
The main thing to note here is this.props.children. You'll use the Layout component in the next steps to wrap your Login and Signup components and their contents will appear in place of this.props.children.
That's it for the Layout. Now on to the Signup component!
The Signup component
Logically, users need to be able to sign up before they can log in right? Let's create the Signup page first then.
In your Signup.js file, create a class based component with some necessary imports like so:
import React, { Component } from "react";
import { Link } from "react-router-dom";
import { Button, Form, Message } from "semantic-ui-react";
import Layout from "./Layout";

class Signup extends Component {
  render() {
    return <div></div>;
  }
}
export default Signup;
See how we're bringing in the Layout component from the last step? Next we'll use it to wrap the entire contents of the Signup component.
Change your return statement to look like the following:
render() {
    return (
      <Layout header="Sign up to get started">
        <Form.Input
          fluid
          icon="user"
          iconPosition="left"
          placeholder="E-mail address"
          className="auth-input-field"
        />
        <Form.Input
          fluid
          icon="lock"
          iconPosition="left"
          placeholder="Password"
          type="password"
          className="auth-input-field"
        />
        <Form.Input
          fluid
          icon="lock"
          iconPosition="left"
          placeholder="Confirm Password"
          type="password"
          className="auth-input-field"
        />

        <Link to="/dashboard">
          <Button color="teal" fluid size="huge">
            Sign up
          </Button>
        </Link>

        <Message size="big">
          <Link to="/login">Already Registered?</Link>
        </Message>
      </Layout>
    );
  }
A few things worth mentioning
- There is three Form.Input components from Semantic UI React that take an email, a > password and a confirmation password.
- There is a Button component with a React Router Link to /dashboard.
- And there is a Message component with a link to /login in case the user is already registered
Routes and a Few more Components
Before you move on to the Login component, you'll need to create some routes in App.js using React Router and create a couple more components.
1. The Dashboard and Done components
For now, when you click 'Log in' or 'Sign up' you'll be taken to either the Dashboard or the Done component. But you haven't set them up yet. So add the following to the src/components/auth/Done.js file you created earlier:
import React, { Component } from "react";

class Done extends Component {
  render() {
    return <div>Thanks for signing up!</div>;
  }
}
export default Done;
and add the following to src/components/dashboard/Dashboard:
import React, { Component } from "react";

class Dashboard extends Component {
  render() {
    return <div>Welcome to the dashboard!</div>;
  }
}
export default Dashboard;
Pretty basic I know but later on in this series you will add a lot more to these components. For now they are enough to get the job done.
2. App.js
Here is the complete App.js file you'll need for this part of the series. Edit yours now to look like this:
import React, { Component } from "react";
import { BrowserRouter as Router, Route } from "react-router-dom";
import Login from "./components/auth/Login";
import Signup from "./components/auth/Signup";
import Done from "./components/auth/Done";
import Dashboard from "./components/dashboard/Dashboard";

class App extends Component {
  render() {
    return (
      <Router>
        <Route exact path="/" component={Login} />
        <Route exact path="/login" component={Login} />
        <Route exact path="/signup" component={Signup} />
        <Route exact path="/done" component={Done} />
        <Route exact path="/dashboard" component={Dashboard} />
      </Router>
    );
  }
}
export default App;
If you haven't used React Router before, were using the BrowserRouter (A router that uses the HTML5 history API) to wrap our routes (Which you must do with React Router). When a user navigates to one of these routes, the corresponding component is displayed. Pretty nifty right?
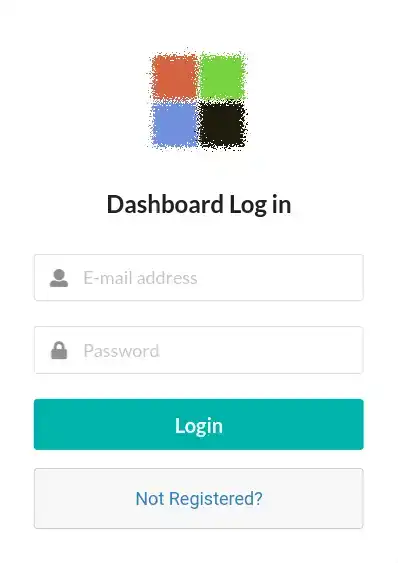
The Login Component
The Login component is an exact copy of the Signup component but with the "confirm password" form removed (users won't need to confirm their password when they log in) and the Links pointing to /dashboard and /signup instead. Here it is, in all it's glory:
import React, { Component } from "react";
import { Link } from "react-router-dom";
import { Button, Form, Message } from "semantic-ui-react";
import Layout from "./Layout";

class Login extends Component {
  render() {
    return (
      <Layout header="Dashboard Log in">
        <Form.Input
          fluid
          icon="user"
          iconPosition="left"
          placeholder="E-mail address"
          className="auth-input-field"
        />
        <Form.Input
          fluid
          icon="lock"
          iconPosition="left"
          placeholder="Password"
          type="password"
          className="auth-input-field"
        />

        <Link to="/dashboard">
          <Button color="teal" fluid size="huge">
            Login
          </Button>
        </Link>

        <Message size="big">
          <Link to="/signup">Not Registered?</Link>
        </Message>
      </Layout>
    );
  }
}
export default Login;
But Does it Work?
Time to find out if all your hard work has paid off. In your projects terminal, type npm start and you should see the following:
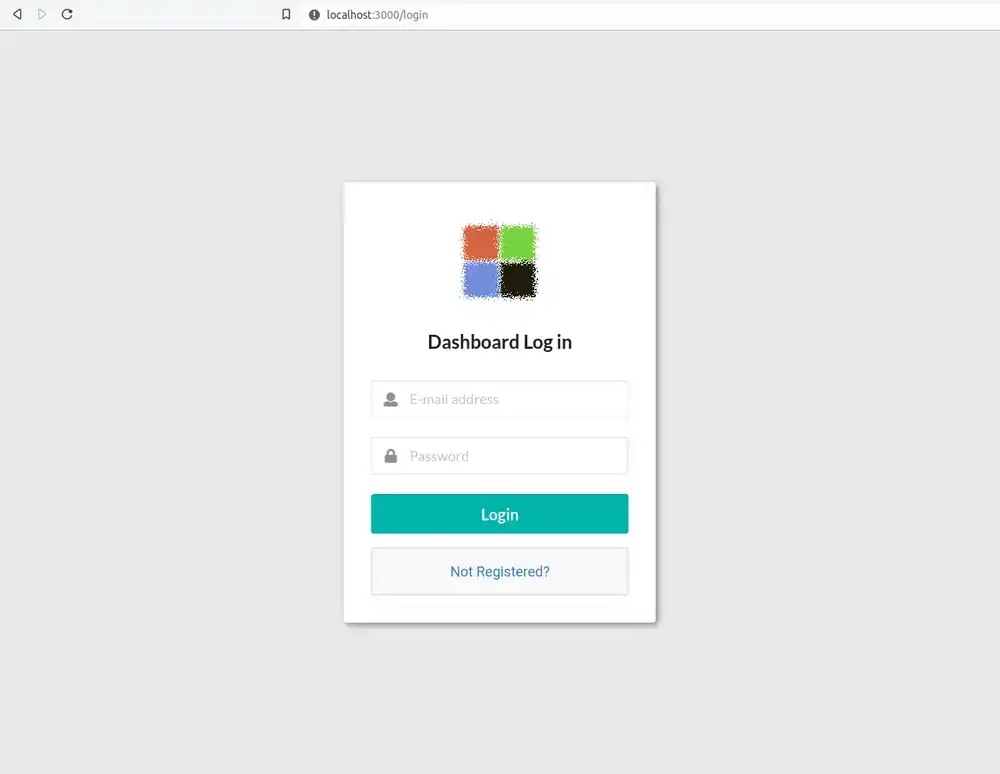
If you click on the "Not Registered?" text, you should be taken to the Signup component and clicking "Already Registered" should take you back.
Clicking the "Log in" button on the Login page should take you to localhost:3000/dashboard and clicking "Sign up" on the Signup page should take you tol ocalhost:3000/done.
Conclusion
There you have it! Although you can't exactly log in or sign up yet, you have a good start to your frontend log in system using Semantic UI React components and React Router 5. Later in this series we will improve on these pages more by connecting to an API and using redux for state management. Stay tuned!
Tools
Crypto Alerts
© Cloud Giant 2024. All rights reserved