

Create a REST API [Part 4]: Send Emails with Amazon SES
In this tutorial, you will use Amazon's Simple Email Service to send an email to your users with a verification token when they register using your API. This is part 4 of a series of tutorials on building a REST API in Node with ExpressJS, KnexJS, and PostgreSQL.

![Create a REST API [Part 4]: Send Emails with Amazon SES](/static/81ade7b7964da5e51b46f26aca71b3f3/aeda5/create-a-rest-api-postgresql-with-knex-setup.webp)
More from this series
- Project Setup with Express
- PostgreSQL with KnexJS Setup
- User Registration and Validation
- Send Emails with Amazon SES
- Verify Users with Tokens
- User Login with JWT Authentication
- Forgot / Reset Password Routes
Introduction
Amazon's simple email service (Amazon SES) allows developers to programmatically send emails through Amazon's servers from any email address that they have verified in their AWS account. In this tutorial you will create a utility function to send emails through Amazon SES and when ever a user is registered through your API, an email will be sent to their email address with a token to verify them with. Let's get started.
Step 1 - Install the AWS SDK
For this tutorial you are going to need a new package called 'aws-sdk' that will allow you to send emails through Amazon SES. Install it now:
npm i aws-sdkStep 2 - Create an AWS access key
In order to use Amazon SES, you will need a free AWS account. Sign up here
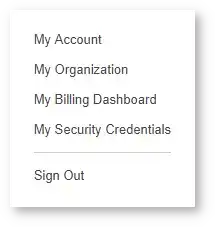
Log in to your AWS account and while in your amazon management console, click your username in the top right corner and select 'My Security Credentials'
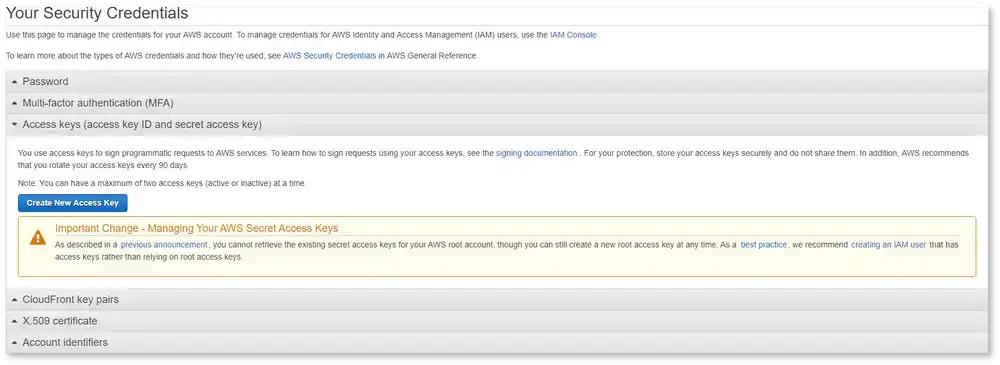
This will take you to the 'Your Security Credentials' page where a popup will give you the option to 'Continue to Security Credentials' or 'Get Started with IAM Users'. Select 'Continue to Security Credentials'.

Warning! Amazon strongly recommends using IAM Users with only limited access. For the purposes of this tutorial we are using root access keys. Do not use these keys in production. If anyone has these keys they have access to sensitive information about your account such as billing information.
Select 'Access keys (access key ID and secret access key)' and click 'Create New Access Key'
In the message that pops up, select 'Download Key File'
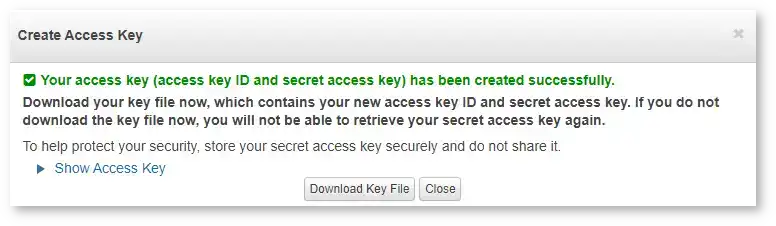
Open the file up in a text editor. These are your root AWS access keys! Keep them safe! We will use them later.
Step 3 - Verify an email address with Amazon SES
With your new AWS account, you have been put in the Amazon SES sandbox with limited features. What this means is that you will need to verify any email addresses that you wish to send emails from and any email addresses you are sending to before they will work. Let's do that now.
While logged in to Amazon AWS, Click here to be taken to the verified senders section of the SES management console. You should see a screen like this:
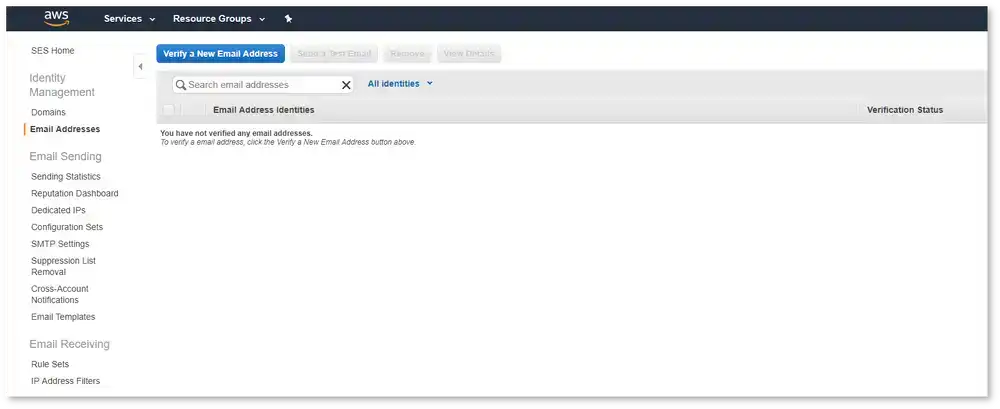
Select 'Verify a New Email Address'
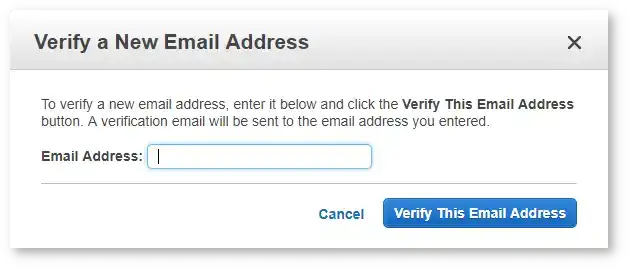
Enter the email that you want verified (Make sure its one you have access to) and select 'Verify This Email Address'. Amazon will send you an email with a link to verify that address with Amazon SES. You can now use that email as the 'from' variable later on in this tutorial. Repeat this step for the email address you are going to send emails to while testing.
In production, you wouldn't want to have to add all of your users to Amazon before you could send emails to them. You can request to be taken out of sandbox mode through the AWS console.
Step 4 - Create AWS environment variables
If you haven't used environment variables before, they are simply global variables available in your environment (such as Linux or Windows) and are supposed to be a more secure way to store sensitive information. Let's set your AWS access keys in some environment variables now.
In a Windows command line enter:
set AWS_ACCESS_KEY_ID=AKIAIOSFODNN7EXAMPLE
set AWS_SECRET_ACCESS_KEY=wJalrXUtnFEMI/K7MDENG/bPxRfiCYEXAMPLEKEY
set AWS_DEFAULT_REGION=us-east-1
or in Linux/macOS enter this in a terminal:
export AWS_ACCESS_KEY_ID=AKIAIOSFODNN7EXAMPLE
export AWS_SECRET_ACCESS_KEY=wJalrXUtnFEMI/K7MDENG/bPxRfiCYEXAMPLEKEY
export AWS_DEFAULT_REGION=us-east-1
Make sure you use your own access key and secret access key instead of the ones in this example.
Step 5 - Create a send email utility
In your project's root directory, create a new folder called utilities and create a file called 'sendEmail.js'. In this file we will use those AWS environment variables we just created for sending emails with Amazon SES. We will also use the email we verified with Amazon SES as the 'from' variable.
// simplecode-api/utilities/sendEmail.js

const aws = require("aws-sdk");
// use AWS global variables
aws.config.accessKeyId;
aws.config.secretAccessKey;
aws.config.region = "us-east-1";

// Create an Email function
function Email(to, sub, content) {
  let ses = new aws.SES();

  let from = "user@example.com"; // The email address added here must be verified in Amazon SES
  //Amazon SES email format
  ses.sendEmail(
    {
      Source: from,
      Destination: { ToAddresses: to },
      Message: {
        Subject: {
          Data: sub,
        },
        Body: {
          Html: {
            Data: content,
          },
        },
      },
    },
    function (err, data) {
      if (err) {
        console.log(err);
      } else {
        console.log("Email sent:");
        console.log(data);
      }
    }
  );
}
// Export the Email function
module.exports = {
  Email,
};
Step 6 - Using sendEmail in your register route
At the top of your users.js file, bring in the 'sendEmail.js' file you just created
// simple-api/api/routes/users.js
const express = require("express");
const router = express.Router();
const bcrypt = require("bcryptjs");
const crypto = require("crypto");
const database = require("../../database");
// Send email utility
const sendEmail = require("../../utilities/sendEmail");
// Validation
const checkRegistrationFields = require("../../validation/register");
change the '.then' and '.catch' of your register route:
.then(user => {
          let to = [user[0].email]; // Email address must be an array

          // When you set up your front-end you can create a working verification link here
          let link = "https://yourWebsite/v1/users/verify/" + user[0].token;

          // Subject of your email
          let sub = "Confirm Registration";

          // In this email we are sending HTML
          let content =
            "<body><p>Please verify your email.</p> <a href=" +
            link +
            ">Verify email</a></body>";
          // Use the Email function of our send email utility
          sendEmail.Email(to, sub, content);

          res.json("Success!");
        })
        .catch(err => {
          console.log(err);
          errors.account = "Email already registered";
          res.status(400).json(errors);
        });
Step 7 - See it in action
Back in postman make a new post request to 'localhost:3000/v1/users/register' with an email that you haven't registered in your database yet.
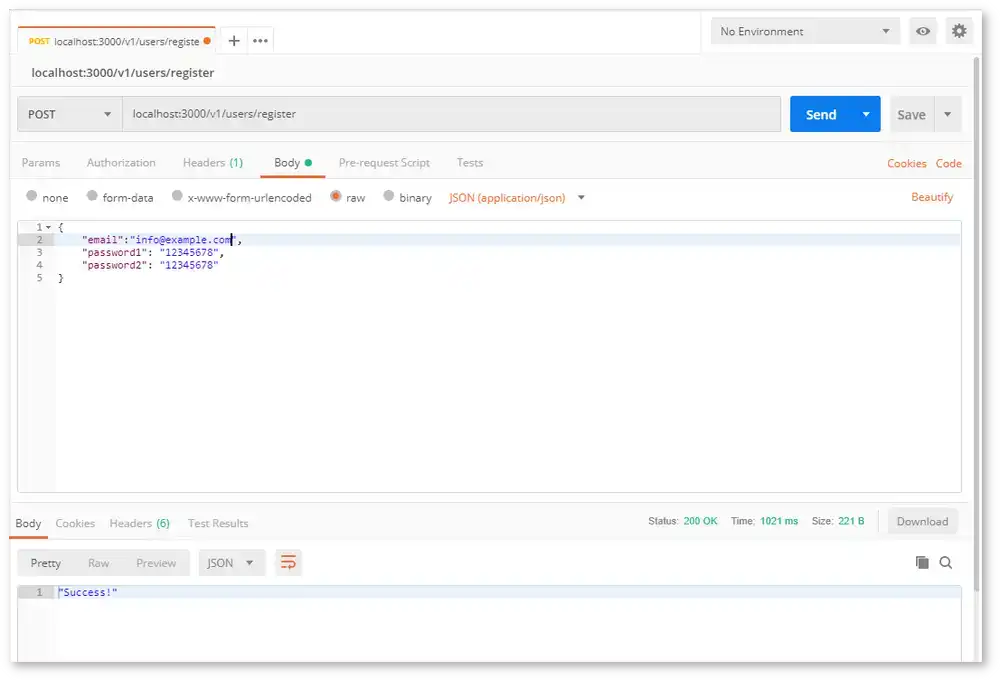
That 'Success!' message means an email was sent to 'info@example.com' (Hopefully you used an email you have access to). Open up your email account and you should have an email with a link to verify your email.
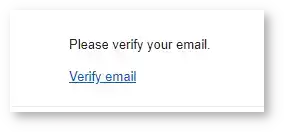
The link will take you to an address that wont work (This is where frontend would take over) but at the end of that link is the token you will use in the next tutorial to verify your users email addresses with. Pretty cool huh?

Conclusion
When users register with your API (or more likely from a website connected to your API) you will want some way to verify that they are using real email addresses. This is for their benefit since they may make a typo while registering but also for your benefit because you won't end up with a bunch of fake users in your database. In the next tutorial you will create a new API route to verify users in your database using the token you emailed them in this tutorial. See you there!
Use one of the links below to share this series on social media if it helped you out!
Tools
Crypto Alerts
© Cloud Giant 2024. All rights reserved