Create a REST API [Part 1]: Project Setup with Express
In this tutorial, we will create a new NodeJS project with ExpressJS, body-parser, and nodemon and get our server.js file ready to build a REST API. This is part 1 of a series of tutorials on building a REST API in Node with ExpressJS, KnexJS, and PostgreSQL.
![Create a REST API [Part 1]: Project Setup with Express](/static/81ade7b7964da5e51b46f26aca71b3f3/8c79c/create-a-rest-api-postgresql-with-knex-setup.png)
More from this series
- Project Setup with Express
- PostgreSQL with KnexJS Setup
- User Registration and Validation
- Send Emails with Amazon SES
- Verify Users with Tokens
- User Login with JWT Authentication
- Forgot / Reset Password Routes
Project Setup
1. Create a new node project
Create a new node project (We called ours 'simple-api'). Run the following from your command line or terminal
mkdir simple-api
cd simple-api
npm init
NPM will ask you a series of unimportant questions about naming your package and version numbers. Just hit 'Enter' until you get to 'entry point' and type in server.js instead of the default index.js. Create a server.js file now in your projects root directory.
2. Install some packages
For this part of the tutorial series we will need express, body-parser and nodemon.
express - A web framework for Node.js which makes working on web applications easier by providing a nice coder-friendly layer on the Node.js HTTP server. Check out the express website for more details.
body-parser - Middleware for Express that extracts the body of an incoming request stream into a more usable form, ‘req.body’. You can read more about it here
nodemon - Automatically restarts node applications when changes are made to a directory. Read more about it here.
Run the following command to install express and body-parser:
npm i express body-parserand install nodemon globally so you can use it as a command line tool
npm i nodemon -g3. Don't forget Git
This would be a good time to create a .gitignore file and do an initial commit.
# .gitignore
node_modules/
4. Create an entry point file
I like to use server.js instead of index.js for NodeJS projects just to differentiate the backend from the front end a little. You can use anything you'd like really. Create a server.js file now
// simplecode-api/server.js
const express = require("express");
const app = express();
const bodyParser = require("body-parser");

// Include users.js file from the api directory (We will add this in the next step)
const userRoutes = require("./api/routes/users");

// Configure body-parser settings
app.use(bodyParser.urlencoded({ extended: true }));

// Parse json with body-parser
app.use(bodyParser.json());

// Setup your api routes with express
app.use("/v1/users", userRoutes);

// Listen on port 3000 if environment variable is not set
const port = process.env.PORT || 3000;

// express returns an HTTP server
app.listen(port, () => console.log("[Server] online " + new Date()));
Why 'v1/users' ?
The reason we use ‘/v1/’ in our routes is to make versioning possible and to future proof a little. Instead of making breaking changes to the users route you could just create a 'v2/users' route and migrate to this route over time.
5. Let's setup our users routes file
First create a directory called ‘api’ in your project root with another directory called 'routes' inside that.
Next create a ‘users.js’ file in the ‘routes’ directory. In the ‘users.js’ file we will include the
express router middleware for our routing.
// simeplcode-api/api/routes/users.js
// Include express
const express = require("express");

// Include express router middleware
const router = express.Router();

// Add a 'get' method to express router for our test route
router.get("/", function (req, res) {
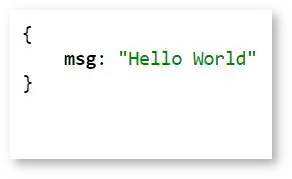
  res.send({ msg: "Hello World" });
});

// Exports the router object
module.exports = router;
Remember, this file is loaded by server.js and inserted at the end of the 'v1/users' route.
So in this test route we are adding '/' to the end of our users route which will respond to any requests to 'localhost:3000/v1/users/'. We'll see this in action in the next few steps.
6. Start your server
In your projects root directory in a command line or terminal run the following to start your server:
nodemon server.jsand you'll see the following:
[nodemon] 1.18.6
[nodemon] to restart at any time, enter `rs`
[nodemon] watching: *.*
[nodemon] starting `node server.js`
[Server] online Thu Dec 08 2018 09:57:07 GMT-0500 (Eastern Standard Time)
Nice! Your server is up and running!
7. See it in the browser
With your server up and running, open a web browser and go to 'localhost:3000/v1/users' (Remember this route we create earlier?). You should see the following:
8. Test it with Postman
Before we move on to part 2 of this series, it might be useful to download and install Postman. Once you have postman open, select the GET method, type in ‘localhost:3000/v1/users/’ in the address bar and click 'Send'. You should see the same “Hello World” message as you did in your browser.
Success! You have yourself an API (Although it doesn't do much yet).
Conclusion
You now have a working yet basic REST API that we will continue to build on throughout this series. Move on to part 2 where we will connect to a PostgreSQL database using another excellent NodeJS package called KnexJS. Leave a comment below if you need help or have anything to add!

Tools
Crypto Alerts
© Cloud Giant 2024. All rights reserved

